
Let’s start with understanding the perfect solution to migrate Kerio to Office 365. There are an unlimited number of solutions as well as queries present on the Internet for the same. But we have come up with a better-quality solution to solve their issues without putting much of their time and effort.
Kerio is one of the well-known Email Servers developed by Kerio Technologies. It is usually used by both small-scale and medium-scale business owners. Also, it stores the entire data and all the mailbox items properly including emails, contacts, calendars, and other data items. Users want to migrate to Microsoft 365 only because it is a Cloud-Based service and has better security features and functions.
There is both the manual as well as the professional solution exists on the Internet. Let’s discuss the same.
User Query
“Hey, I am looking for a solution to migrate Kerio Connect mailboxes (offline files) to a Cloud-Based Service that can store my lot of data such as Office 365. I am finding a way for the last 2 days but didn’t be able to find the perfect solution. Is there any solution available to migrate Kerio Server to Microsoft 365?”
Migrate Kerio to Office 365 Manually
In the manual solution, we need to use the Kerio Outlook Connector tool to directly migrate the data. This process is easy to use but is too lengthy and will take a lot of your time and effort.
Step1: Use Connector Tool for Integration
- Firstly, install the trial version of Kerio Outlook Connector.
- Choose “Integration with Windows”.
- Then Download it.

Step2: Add Connector with MS Outlook
- Launch Outlook >> go to “File” menu.
- Click on Info >> Add account.
- Then, choose “Manual configure server settings or additional settings” and Next.
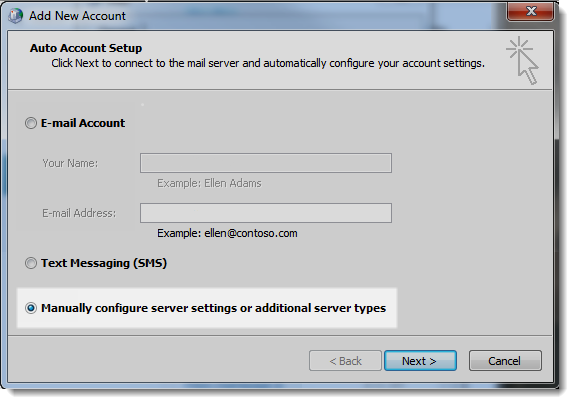
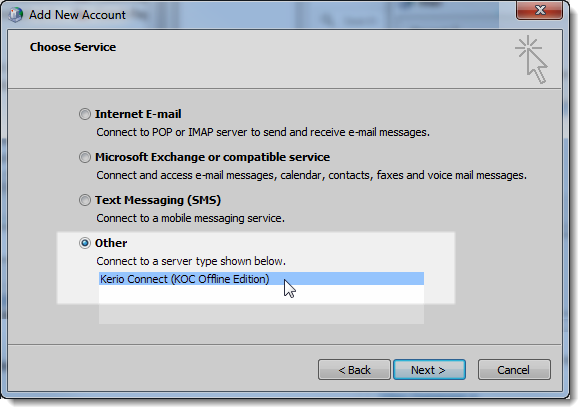
- Choose Other and select the Kerio Connect option.
After performing these steps, log in thereby entering the correct login credentials to migrate the data to office 365.
Step3: Export PST from Outlook
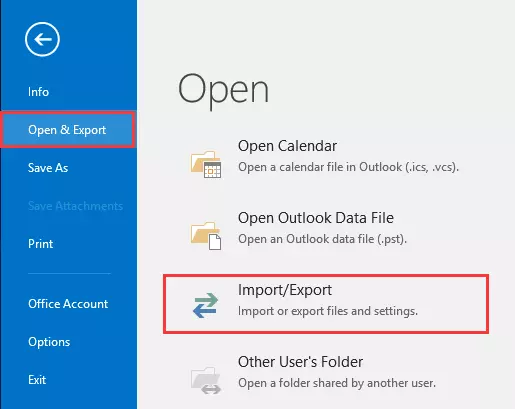
- Open Outlook >> File Menu.
- Choose Open & Export >> Import/Export.
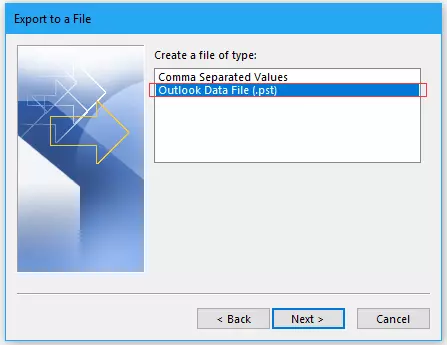
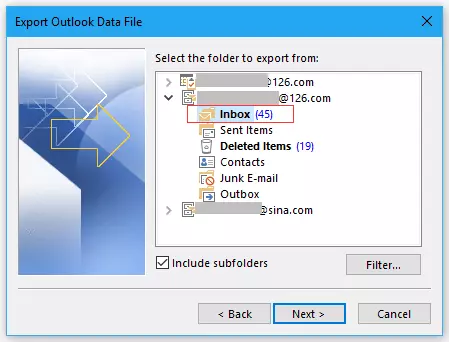
- Select Outlook Data File (.pst) >> Export to a file.
- Then, choose the needed data to migrate.
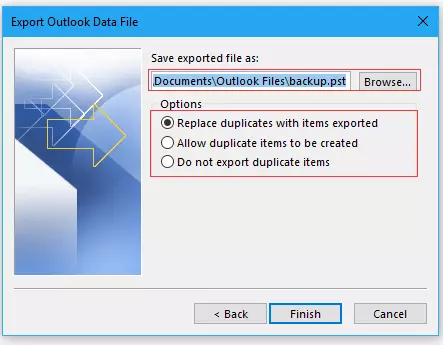
- Enter the destination location to store the resultant file.
Step4: Import Resultant File to Office 365
After performing the above 3 steps, we have finally received the exported data from Kerio. Now, you just need to import PST files to Office 365, there are different solutions for this present.
Perfect Solution to Migrate Kerio Connect to Microsoft Office 365
We recommend you use PCDOTS Kerio Migration Tool to migrate the entire mailbox data to office 365. The tool is one of the perfect utilities that allow users to migrate multiple data within a single attempt without any loss of data.
Also, this utility can be easily used by all the users and provides a flexible user interface to the users. It also supports 20+ formats including file formats and Email Services for Backup / Conversion / Migration options. You can also search for a particular email from the bulk of data present on the panel.
Download Kerio to Office 365 Migration Tool for free and start the process.

Simple Steps to Migrate Kerio Connect to O365
- Run the mentioned utility.
- Upload the Kerio Server files.
- Select the required data.
- Go to Export >> select Office 365.
- Get the resultant message.
Procedure for Kerio Connect to Office 365 Migration solution
- Firstly, run the given migration tool in your existing Windows OS system and click on the Open Menu.

- Select Email Servers >> Kerio Files >> Upload the Kerio files and folders directly to the system.

- You can see the detailed preview of all the Kerio mailboxes on the screen. Choose the required emails you want to export.

- Go to Export Menu >> Office 365 as the Email Service.

- Then, enter the login details of the Microsoft 365 Account and click on save.

- After that, wait for a few minutes and you can see the migration message on the screen.
 Hence, by performing these steps, users can easily export the entire data without facing any kind of issues.
Moreover, by login into the Account, you can be able to see the exported Kerio data.
Key Aspects of Migration Tool
- Bulk Migration
This utility can easily migrate the entire mailbox to Microsoft 365 in bulk without reporting any errors and any size limitations. While migrating the data, the entire hierarchy of all the files and folders is maintained throughout. - Unique Search Option
It allows users to search for a particular email from the bulk of data instantly. Using different intents such as To, Cc, Bcc, Subject, and other Email headers, it is possible to locate the data. The date Range option will carry out the emails of a particular duration. - Extract Email Attributes
Moreover, the Wizard has the ability to download email elements such as Kerio Attachments, Kerio Email Addresses, and Phone numbers individually. Email Addresses and phone numbers will be taken out in the form of Text file format. - Include Email Headers
The software allows you to include the email headers such as To, Cc, Bcc, From etc. With the software, you’re free to include or exclude the email headers in the exported emails.
Also Read:
Wrap-Up
Therefore, you can use the entire solution and easily migrate Kerio to Office 365 without the need for any technical guide and without facing any type of issue. In addition, there are multiple solutions available but we recommend you continue with this migration utility. You will get better and instant results without wasting much time and effort.


